Most indoor cycling bike setup advice stops at "raise the seat to your hip." That gets you pedaling. It does not get you through mile 20 with quiet knees and a frame that stays planted when you stand up out of the saddle.
I have taught more than 5,000 indoor cycling classes over 14 years, first in studios and now in a converted garage in Boise, Idaho, with a wrench set sitting by the door. In that time I have watched the same three problems end home riding programs: a bike that rocks the second you leave the saddle, a seat height that is an inch or two off, and a resistance knob that slips the moment you push.
Two of those fixes are free. The third is a return label. This is the indoor cycling bike setup routine I run on any bike before I ride it hard: floor contact first, then fit, then the resistance and drivetrain checks that decide whether the bike is still worth riding at month three.
Why you should trust me
I teach indoor cycling for a living. Fourteen years, more than 5,000 classes, and a garage program where my riders put in 50-mile weeks on bikes that range from a few hundred dollars to commercial studio money.
Every bike I bring home gets the same treatment: a 50-mile break-in, a standing sprint at full resistance to watch the frame flex, a 45-minute sweat test to see what the paint and hardware do under real moisture, and a bearing check at month three. I keep a spreadsheet of seat post slip and resistance knob behavior, because those are the two failures that show up right after the return window closes.
I also have a bias you should know about. I teach on a commercial bike that costs more than most people's first car, and I still recommend budget bikes to my riders, because fit and setup beat specs every time. A $300 bike that fits you beats a $1,500 bike that does not.
How I picked and how I tested
I judge a home bike on four things, in this order: does it stay planted during a standing sprint, is the resistance smooth across the whole range, will the seat and pedals survive month three, and would I teach a class on it. Everything else, including flywheel marketing and console features, is secondary.
The two bikes in this guide cover the two shapes a home rider actually ends up on: an upright spin bike and a recumbent. They are not the same workout and they are not built for the same body. What follows is the setup routine, plus what the specs on each listing do and do not tell you before you buy.
One note on numbers: I am not going to quote prices here, because listings move. Both bikes are linked below, and the current number lives on the Amazon page. What I can tell you is how each one sets up, because that is the part that decides whether you are still riding it in November.
The two bikes this routine is built around
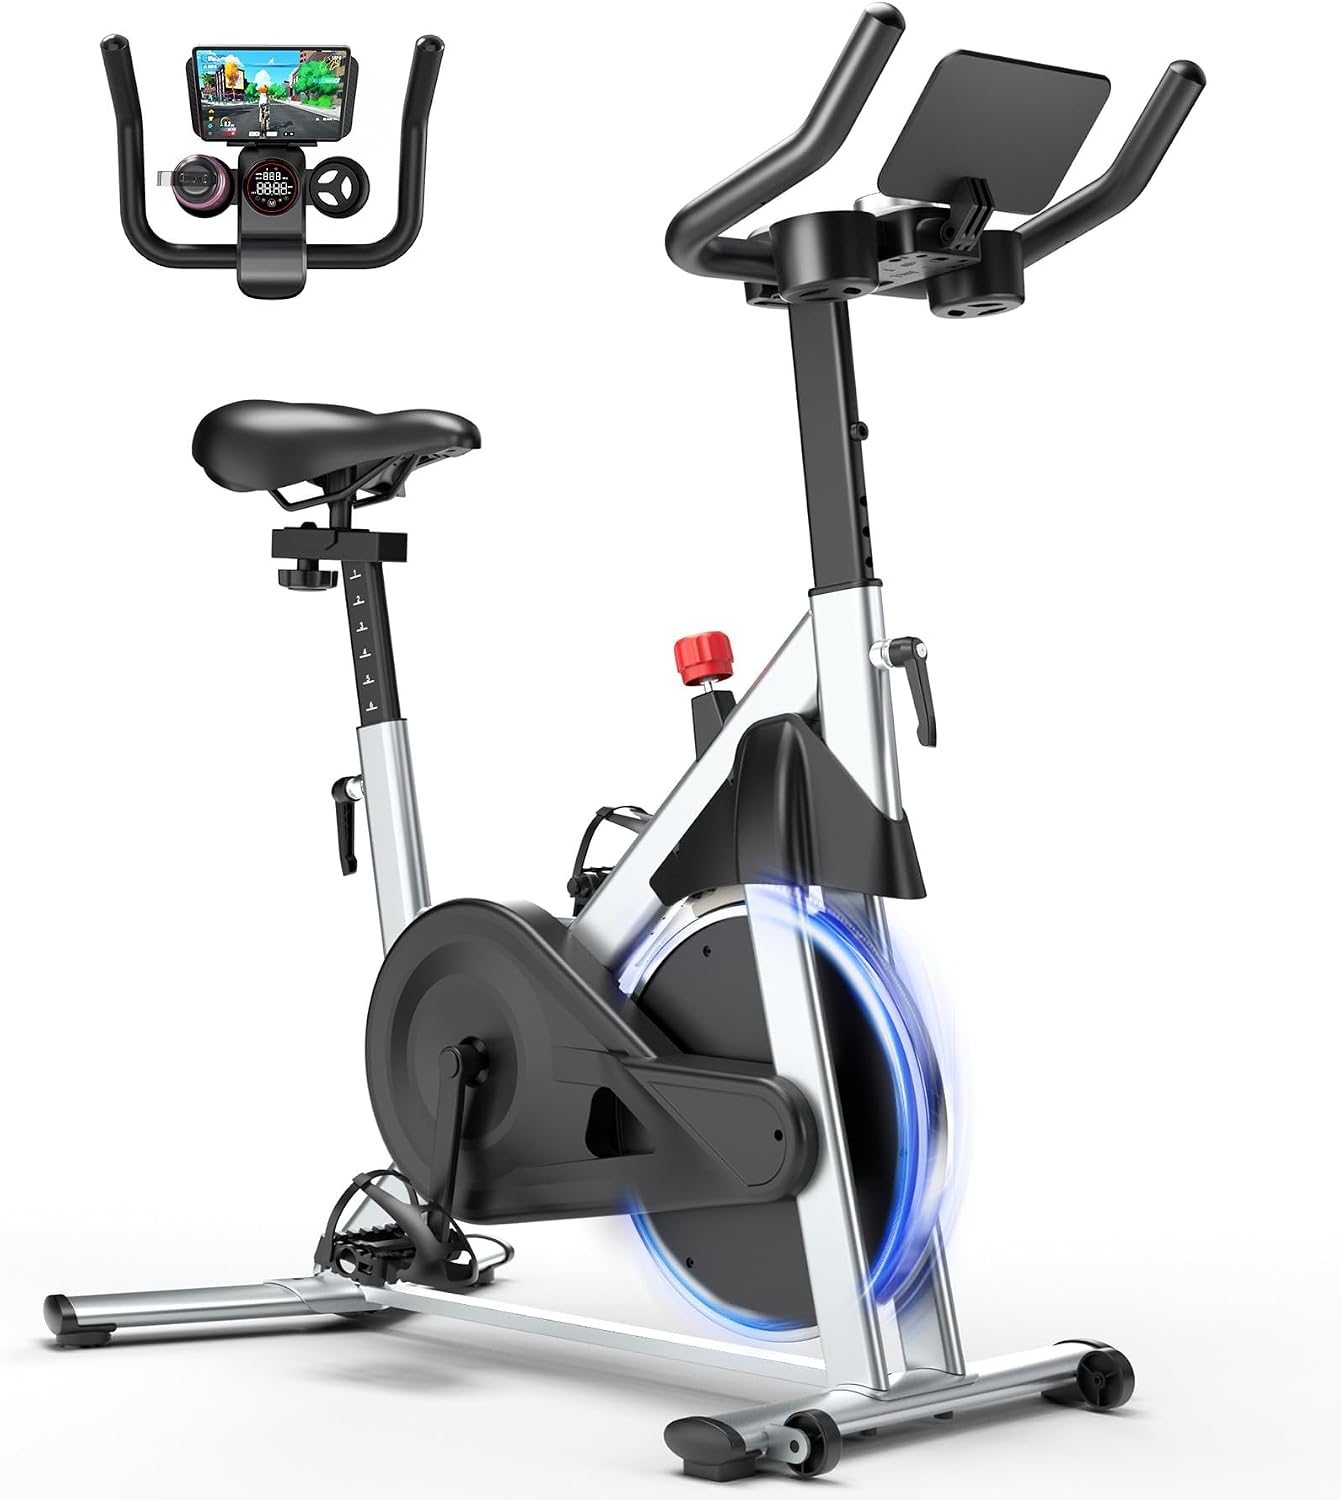
Our pick for a spin setup: Indoor Cycling Bike - 32-Level Magnetic Resistance Stationary Exercise Bike with Adjustable Seat & Handlebars, Silent Belt Drive for Home Cardio (Fits Users 5'1" to 5'11", 300lbs Capacity)
 Visit on Amazon →
This is the upright bike I would put in a garage first. Three things in the spec sheet matter more than the rest: magnetic resistance, a belt drive, and handlebars that adjust in addition to the seat.
Magnetic resistance is the part that lasts. There is no felt pad to wear a groove into the flywheel, which means the resistance you feel in month one is roughly the resistance you feel in month twelve, as long as the knob mechanism holds. A wide resistance range is also what makes interval work possible at home. A narrow range gives you easy and hard with nothing usable in between, and every sprint interval you program lives in the middle of the range.
The belt drive matters for a different reason: no chain oil on your carpet, and no pad dust on the baseboards. On a bike that lives in a spare room or a living room, that is not a small thing.
The stated fit range is 5'1" to 5'11" with a 300 pound capacity. Believe that number. If you are taller than 5'11" or heavier than the listed capacity, this is not your bike, and no amount of seat post fiddling will make it one.
Flaws but not dealbreakers: Bikes in this class almost always ship with a seat that most riders replace, and with plastic pedal cages that I take off in the first week. Budget for both. Neither one is a reason to skip the bike.
Anyone between 5'1" and 5'11" who wants a quiet, low-maintenance upright for HIIT and steady rides at home should start here.
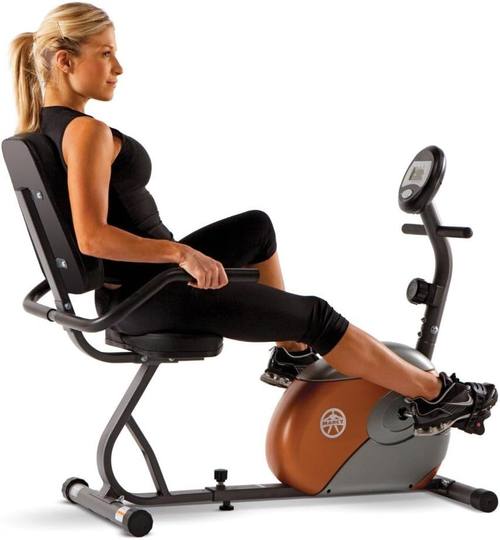
Alternative for riders who want a backrest: BRAND NEW Marcy ME 709 Recumbent Exercise Bike with Large Console Display
 Visit on Amazon →
A recumbent is not a downgrade. It is a different machine for a different set of problems. If your lower back, wrists, or shoulders complain on an upright, a recumbent is how you keep riding instead of quitting, and I would rather see someone riding a recumbent five days a week than an upright once.
The geometry changes the setup completely. You sit in a bucket with your legs out in front of you, so leg extension is set by sliding the seat rather than raising it, and the backrest angle is a real fit adjustment, not a comfort afterthought. Set the backrest first, then the seat distance. If you set the seat first and then recline the back, you have just changed your leg extension without realizing it.
The large console display is the other practical difference. On a recumbent you are sitting back with the console in front of your chest rather than below your face, so a readable screen with bigger numbers genuinely helps when you are trying to hold a steady effort.
The stability test changes too. You will not do a standing sprint on a recumbent, so instead you push hard seated, at high resistance, and watch the frame and the seat mount for flex. A recumbent that wanders under a hard seated effort is not worth keeping.
Flaws but not dealbreakers: A recumbent will not give you the same standing-climb feel as an upright, and no setup trick changes that. If your goal is sprint intervals out of the saddle, buy the upright.
Anyone with back or wrist issues, or anyone coming back from an injury, should look here before they look at an upright.
The setup routine, step by step
Now the part you came for. This works on the upright above, on the recumbent, and on most home bikes in this price class.
Step one: Put the bike where it will live. Moving a bike after setup means redoing the whole fit, so pick the spot before you turn a single adjuster. Hard, level floor if you have it. Carpet needs a mat, and a mat on thick pile still compresses unevenly under the front stabilizer. A bike that walks across the room during sprints is usually a floor problem before it is a frame problem.
Step two: Level the feet. Most bikes in this class have adjustable feet under the stabilizers. Spin them out until the bike sits without rocking, then grab the handlebars and push side to side hard, the way you would at sprint resistance. If you hear a clunk or feel a rock, keep turning. Do this before you fit anything else. A rocking bike makes you think the seat is wrong when the floor is.
Step three: Set seat height with the heel method, not the hip method. Hip height gets you close. The heel method gets you right. Put your heel on the pedal in the lowest position, crank arm in line with the seat tube. Your leg should be almost straight with a slight bend. Once you move your foot to the ball of the pedal, that same setting gives you the knee bend you want at the bottom of the stroke. Knees aching in the front means raise the seat. Feeling it behind the knee, or hips rocking side to side, means lower it.
Step four: Set the fore and aft. Seat forward and back is the adjustment almost nobody touches, and it is the one that decides whether your knees track straight. Get on the bike, put the pedals level at three and nine o'clock, and look down at your front knee. The kneecap should sit roughly over the pedal spindle. Slide the seat to get there.
Step five: Handlebar height and reach. On a home bike, do not drop the bars below the seat unless you know exactly why. A low, aggressive position you can hold for 20 minutes in a studio is not the position you want for a 60-minute garage ride with nobody cueing you. Start with the bars level with the seat and raise them if your lower back or hands complain. Adjustable handlebars, like the upright above has, let you do that without swapping parts.
Step six: Run the resistance knob through the full range. Before your first real ride, turn the resistance from the lightest setting to the heaviest and back. Listen for grinding, feel for dead spots, and check that the knob does not slip when you lean on it. On a magnetic bike you should feel a smooth ramp, not a series of cliffs. A knob that slips at high resistance is a return, not a quirk.
Step seven: Check the pedals and dump the plastic cages. Plastic toe cages are the first thing I take off almost every budget bike. They flex, they crack, and they hold your foot in a position your knee eventually pays for. If the bike takes standard pedals, swap in metal-cage pedals or clipless pedals you already own, and check the threads are tight before the first ride. A pedal that loosens mid-ride strips the crank arm.
Step eight: Protect the frame from your sweat. Forty-five minutes of hard riding puts a lot of salt water on a bike. A towel over the handlebars and a wipe-down after every ride is the difference between paint that lasts and paint that bubbles at the weld. It is the cheapest item on this list and the one people skip.
Step nine: Write your numbers down. Seat height, seat fore and aft notch, handlebar height. Tape a card to the wall or put it in your phone. If more than one person rides the bike, this is the only way you both get a real fit in under a minute.
Step ten: Do the month three check. Spin the pedals backward with the bike off and listen for bearing noise. Check every bolt you can reach, especially the seat post clamp and the stabilizer feet. Re-tighten the pedals. Listen for a chirp from the belt at speed. A bike that is still quiet and still planted at month three is a bike you will keep.
The bikes that didn't make this guide
Plenty of bikes fail this routine on paper before you ever plug in a wrench.
Felt-pad bikes with plastic resistance knobs lose first. The pad grooves the flywheel, the knob strips, and by month four you are riding with a resistance range that has two settings. Magnetic resistance with a metal mechanism is worth paying for.
Bikes that do not fit you lose next. If the seat post will not go high enough or the frame is built for a 5'4" rider and you are 6'1", the setup routine cannot save it. Fit is a hard constraint, not a preference.
Smart bikes tied to a monthly subscription lose for a different reason: you are buying hardware and a service at the same time, and the service is the part that ages badly. If the classes are what keep you riding, that is a real argument. If they are not, buy the hardware and put the subscription money toward a better seat.
Recumbents lose the standing sprint test by design, which is why the recumbent above is not competing with the upright. It is the answer for a rider the upright does not fit.
What this all costs
The honest answer is that both of these bikes are linked above, and the current number lives on the Amazon page. I do not quote prices because listings move, and a price I type today is wrong next week.
What I can tell you is where the real money goes. On almost any bike in this class, you should budget for a seat replacement, because the stock seat is the first thing most riders change and the reason a lot of bikes sit unused by February. Add pedals if the bike ships with plastic cages, and add a mat if the bike is going on carpet.
Then there is the cost that never shows up on a receipt: the twenty minutes of setup you skip because the bike feels fine in the first five. That skipped setup is what turns a bike into a clothes rack. Do the leveling, do the fit, test the knob, write down your numbers, and check the bolts at month three.
That is the whole job. The bike is the easy part.