Most budget spin bikes fail for the same three reasons: the resistance knob slips mid-ride, the seat turns into a brick somewhere around mile 20, and the frame starts walking across the floor the first time you stand up at full tension. None of those are spec sheet problems. They are setup problems, and most of them are fixable in one afternoon with a hex key set and a level.
I have taught more than 5,000 indoor cycling classes and run my own spin program out of a converted garage in Boise for the last fourteen years. I have ridden everything from a commercial Keiser to the cheapest bikes on the internet, and the pattern never changes: the bike that actually gets ridden is the bike that fits, sits still, and does not hurt. A budget spin bike setup that survives 50 miles a week is not about spending more. It is about getting the four contact points right, torquing the hardware before the first ride, and adding the one accessory that keeps your phone and keys off the garage floor.
Here is the order I do it in, the bike I would start a garage rider on, and the handlebar bag that has a real shot at surviving a 45 minute max effort sweat test.
Why you should trust me
Fourteen years of teaching, more than 5,000 classes, my own program in a converted garage, and a spreadsheet that tracks every ride I do. I ride 50 miles a week on the bikes in that garage, and I put every one of them through the same four checks: a standing sprint at full resistance, a 45 minute sweat test to see what the paint and the hardware do, a stability check with the bike on a level floor, and a bearing listen at month three. I keep a wrench set by the door because every bike in that garage has needed one, including the ones that cost more than my first car. My bias is simple. A bike you do not want to sit on is a bike you will not ride, so fit and comfort come before any number on the box.
How I set up and check a budget bike
The order matters more than the tools. Almost every complaint I hear about a cheap spin bike traces back to something that was never tightened, never leveled, or never adjusted to the rider. I work in this sequence: build, level, pedals, seat, bars, resistance, drive, then the sprint test. Skipping ahead to the resistance knob because that is the fun part is how you end up with a bike that wobbles.
You need a hex key set (4 mm and 5 mm cover most of the bolts on this class of bike), a pedal wrench, a small tube of grease, a level, and something to shim with. A folded yoga mat or a scrap of plywood under a stabilizer is enough. Add a torque check to your routine at week one, week four, and month three, because budget bikes settle.
The other thing I check is the floor itself. My garage slab slopes toward the door, which means a bike that looks level against the wall is actually rocking. Put the bike where you will ride it, stand it up, and push down on each stabilizer with your hand. If it rocks, shim it. A bike that rocks at rest is a bike that walks at sprint speed.
The bike I would start a garage rider on
For a home setup I want three things: resistance that stays smooth across the whole range, a drive that does not need maintenance, and a frame that does not flex when I stand up. The listing below covers all three on paper, which is where every budget bike starts. The rest is what you verify in the first 50 miles.
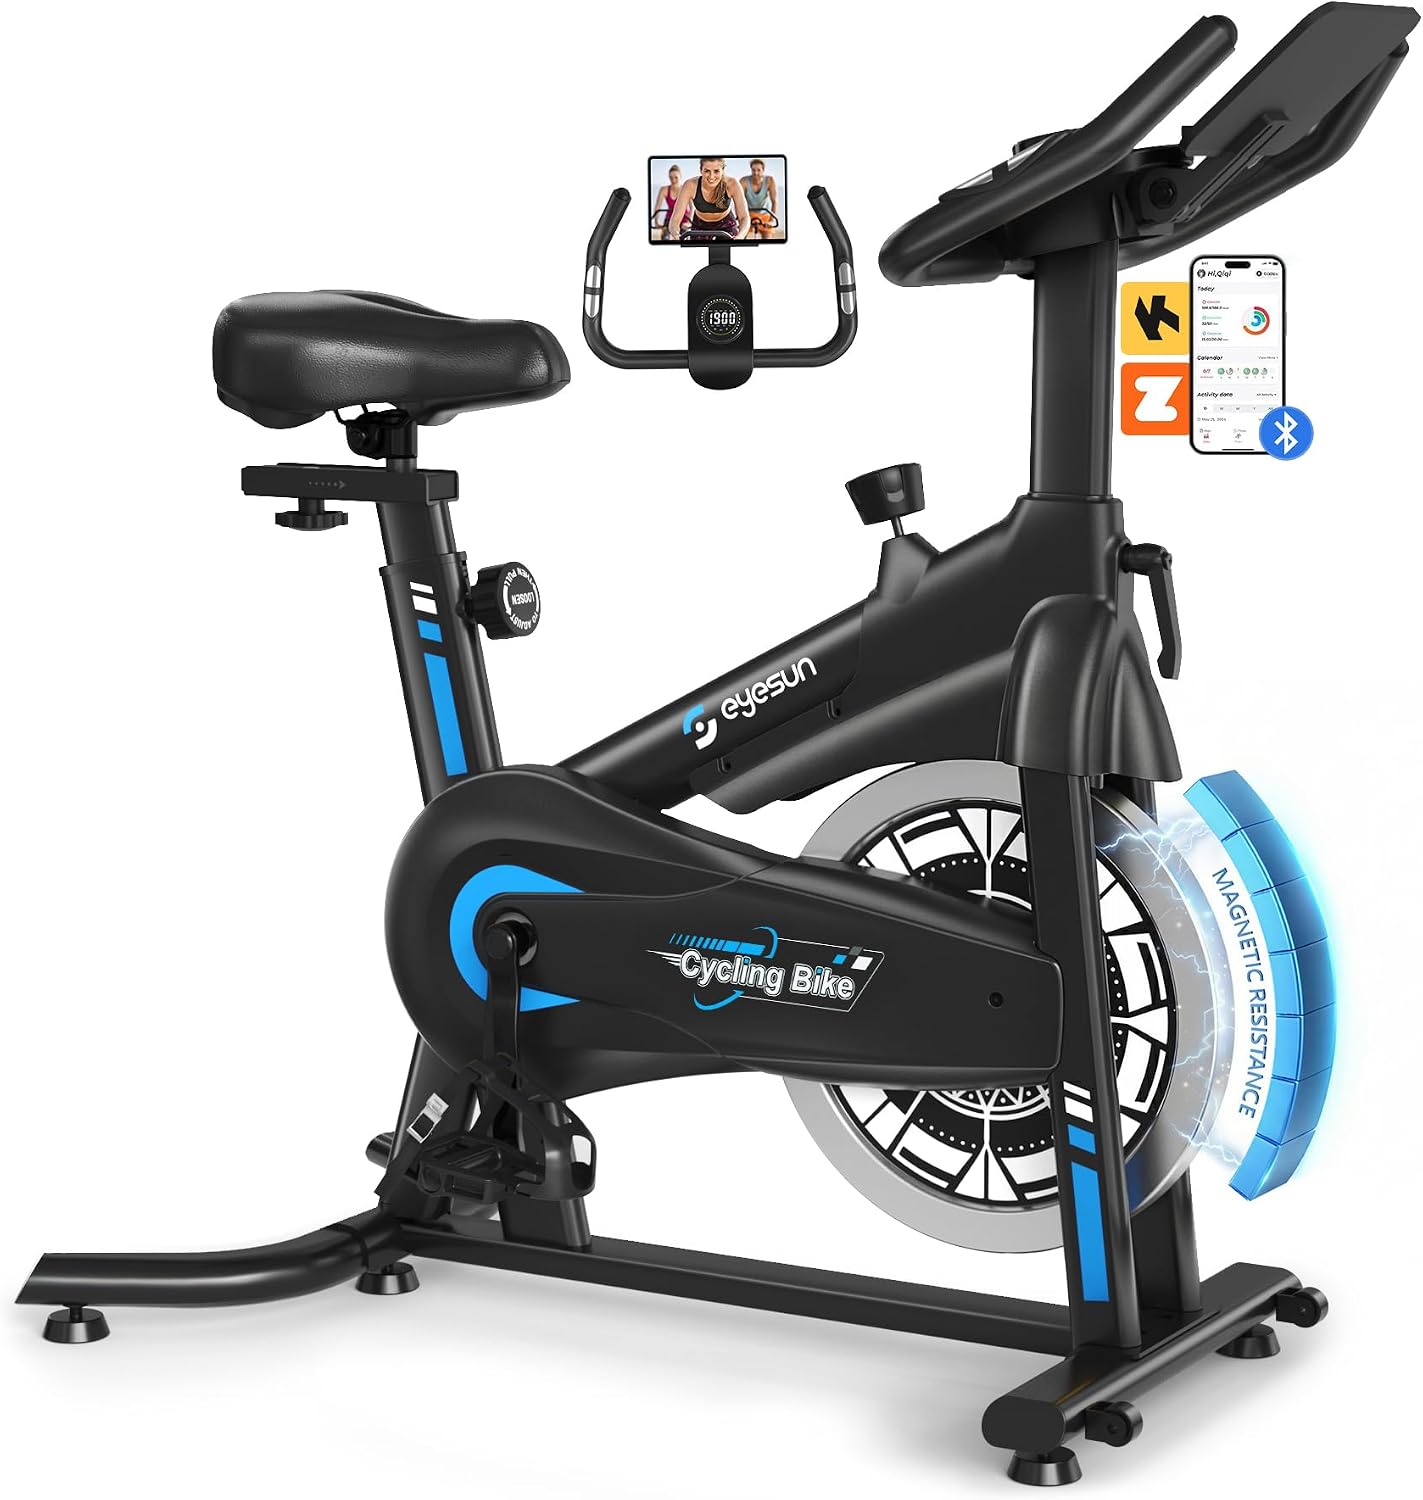
Our pick: Exercise Bikes for Home,Spin Bike with Adjustable Magnetic,Brake Pad Resistance Silent Belt Drive,350lbs/300lbs Weight Capacity &Upgraded Version Seat for Home Cardio&Weight Loss(QM-530W)
 Visit on Amazon →
The two details that matter most here are the magnetic resistance and the belt drive. Magnetic resistance does not wear out the way felt pads do, and it holds a smoother ramp as you turn the knob, which is the difference between a resistance change you can ride and one that grabs. The belt drive means no chain to lube, no chain noise under the TV, and nothing to adjust every month. The maker lists a 350 lb weight capacity, which is well above what most budget frames claim, and the seat is the upgraded version rather than the stock brick that ships on cheaper bikes.
What I would verify on day one: sweep the resistance from zero to full and back three times and feel for a dead spot. Twist the saddle with your hand and confirm the seat post clamp holds. Listen to the belt at a slow cadence with your ear near the frame. Then give the seat 20 miles before you decide anything, because saddles are personal and the first hour lies to everybody.
Flaws but not dealbreakers: At this price, the pedals are usually the weakest part of the build. If they ship with plastic cages, ride them until they annoy you, then swap to a set with metal cages or clips. That is a cheap upgrade and it changes the whole feel of the bike.
The accessory that earns its place on the handlebar
Every rider I coach wants their phone on the bars, and every rider learns the same lesson: a phone in a jersey pocket gets soaked, and a phone balanced on the handlebar ends up on the floor. A handlebar bag solves both problems, and this is the one I would put on a spin bike.
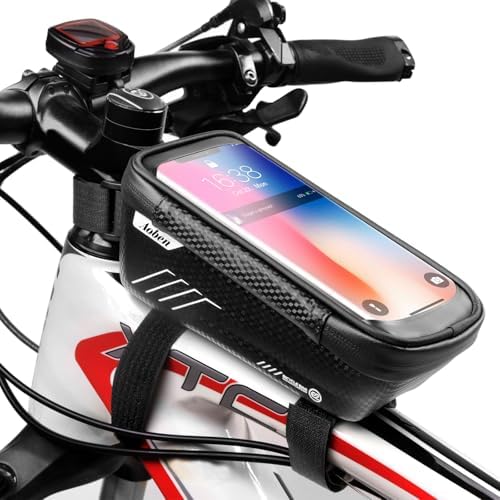
Best add-on: WILD MAN Bike Phone Mount Bag, Waterproof Mountain Bike Accessories with 3D Hard EVA & TPU Touch Screen for Phones Under 6.5'
 Visit on Amazon →
The sweat test is what kills most handlebar bags in my garage. Forty-five minutes at max effort puts more moisture on a bike than a rainy commute does, and a bag that is not actually waterproof turns your phone into a paperweight. This one is built with a waterproof shell and a hard EVA body, which means it holds its shape instead of collapsing against the phone, and the TPU window lets you tap through to a timer or a playlist without pulling the phone out. It is sized for phones under 6.5 inches, so measure yours before you order.
The caveat is the clamp. This bag is designed around mountain bike handlebars, so before you buy, check the diameter of your spin bike handlebar and the shape of the bar where you want it to sit. If the clamp does not seat fully around the bar, send it back and use a simple silicone strap mount instead. A bag that shifts while you sprint is worse than no bag at all.
Flaws but not dealbreakers: The window is touch sensitive, but wet fingers are wet fingers. Wipe your hand on your towel before you tap, or use the physical buttons on your headphones.
The setup workflow, step by step
This is the order. Do not skip to the resistance knob because that is the fun part.
Step one: Build it where you will ride it. Unbox the bike in the room or garage where it lives, count the hardware against the parts list, and lay everything out. Do not tighten anything until the frame is fully assembled. Thread every bolt by hand first, then snug it. Cross threading a frame bolt on day one is the fastest way to turn a budget bike into a return.
Step two: Level the bike and shim the stabilizers. Put the bike on the floor you will ride on and check the stabilizers with your hand. Push down on the left front corner, then the right, then the back. If you feel rock, slide a shim under the low corner. A level across the top tube tells you the truth faster than your eyes do.
Step three: Grease and install the pedals. The right pedal threads on clockwise and the left pedal threads on counterclockwise, which surprises people every single time. Grease the threads, start them by hand, and only then snug them with a pedal wrench. Never force a pedal that does not want to turn. You are threading steel into aluminum, and the aluminum loses.
Step four: Set the seat height first. Stand next to the bike and bring the saddle to roughly hip height, then sit on it and put the ball of your foot on the pedal at the bottom of the stroke. You want a slight bend in the knee, not a locked leg and not a sharply bent one. Keep the seat post above the minimum insertion line, always. A post that sits too high is how seat tubes crack.
Step five: Set the seat fore and aft, then the handlebars. Slide the saddle until your knee tracks over the middle of the pedal when the crank is level with the floor. Then raise the handlebars until your shoulders drop and your hands rest light on the bar. If your shoulders climb toward your ears, the bars are too low, and no amount of core work fixes a bike that is set up wrong.
Step six: Sweep the resistance from zero to full and back. Do it three times before you ride. Magnetic resistance should ramp smoothly with no dead spot and no grab, and the brake pad side of the mechanism should feel like a clean stop rather than a catch. Check the emergency brake too, with your hand on the knob, not by guessing. This is the one safety feature on a spin bike that has to work every time.
Step seven: Check the drive and listen. With a belt drive, spin the cranks slowly and listen for rubbing or a tick. Belt tension should feel firm, not banjo tight. A quiet bike is a bike you will ride at 6 a.m. without waking the house.
Step eight: Ride a five minute standing sprint at full resistance. Stand up, load the resistance, and sprint. If the bike walks across the floor, go back to step two. If the seat post twists, torque the clamp. If the handlebars flex, check those bolts. Whatever moves, fix it now, because at sprint speed a wobble is a safety problem, not an annoyance.
What to check at mile 50
Budget bikes settle. Bolts that were tight on day one are not tight at week three, and that is normal, not a defect. At mile 50 I re-torque every bolt on the frame, the seat post clamp, and the handlebar clamp. I put a wrench on the pedals and check them again. I listen for bearing grind with my ear near the crank and the room quiet. I check the paint where sweat lands, because cheap paint fails the sweat test and a frame that rusts in month four is a frame you stop riding. I check the resistance knob for slip at the same tension I set in week one. Then I write it down, because a bike that needed attention in month one will tell you what it needs in month six.
Where this setup falls short
A budget spin bike does not measure power, and no app will make it. You will train by feel and by time, and by cadence if you add a cheap sensor, and that is fine. Perceived effort works if you are honest about it. What you give up is the number.
The seat is the other place this setup can fall short. The upgraded saddle on the bike above is better than what ships on most bikes in this class, but saddles are personal, and if you are still shifting in the saddle at mile 20, replace it. That is not a knock on the bike. It is the first thing I change on most budget bikes, and I factor it into the price before I buy.
Finally, the phone bag is a phone bag. It will hold a phone, keys, and a gel. It will not hold a water bottle, and it is not a substitute for a proper mount if you ever move it off the spin bike and onto a trail.
What this setup costs
The math here is time and one accessory, not a subscription. Setup takes about 90 minutes the first time and 10 minutes a week after that. The mile 50 check is 15 minutes with a wrench. The bike and the bag both carry a current price on Amazon, and you can check each one from the links above rather than trusting a number in an article that will be stale by spring.
Compare that to studio classes, which in my city run a per-class rate that adds up to a bike in a matter of months. The catch is that the bike has to be set up well enough that you want to get on it. That is the whole point of this workflow.
The bottom line
A budget spin bike is not a compromise if you set it up like a bike instead of an appliance. Level it, torque it, fit it to your body, sweep the resistance, and test it standing up. Add the bag so your phone and keys have a home on the bars. Then ride 50 miles, check everything, and ride it again.
That is the job. Your bike was built to be ridden. Let it.